Homemade Brightening Mask: A Tip for Radiant Skin

Introduction: Homemade Brightening Mask: A Tip for Radiant Skin
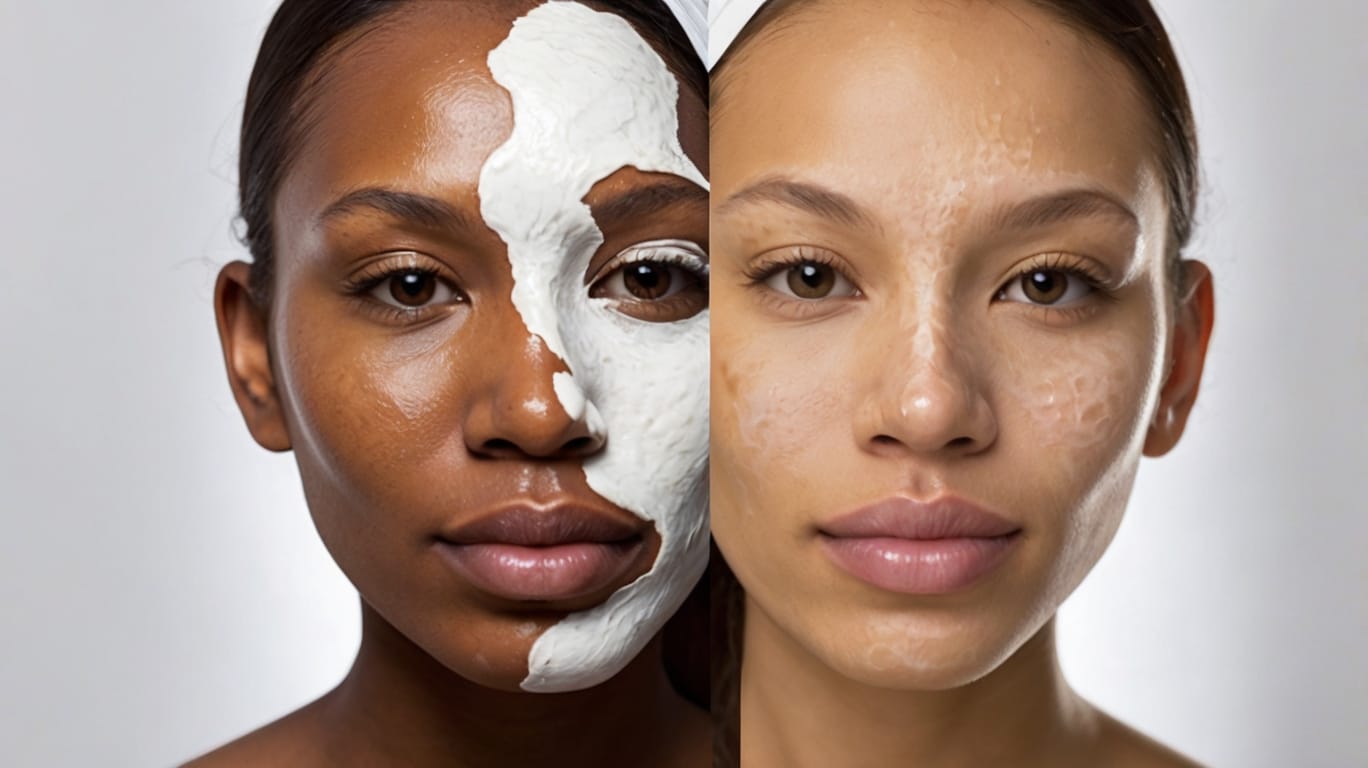
Did you know over 75% of people face uneven skin tone and dullness? Your search for radiant skin ends with a game-changing beauty recipe. This mask, made from potato, cornstarch, milk, and lemon, is your secret to glowing skin.
Natural beauty lovers are finding the power of DIY skincare. It’s not only effective but also easy on the wallet. Say goodbye to pricey treatments and hello to a homemade brightening mask. These ingredients team up to bring back your skin’s natural glow, tackling dark spots and uneven texture.
Your skin is worth the care, and this mask is the perfect mix of science and nature. By knowing how each ingredient helps your skin, you’ll discover a simple yet powerful way to get that luminous look.
Key Takeaways
- Easy-to-make mask using household ingredients
- Natural approach to skin brightening
- Cost-effective alternative to expensive treatments
- Targets uneven skin tone and dullness
- Suitable for multiple skin types
Understanding Natural Skin Brightening
Natural skin brightening has changed how we care for our skin. You don’t need harsh chemicals or pricey treatments for radiant skin. DIY skin care is a gentle, effective way to brighten your complexion with kitchen ingredients.
The beauty of homemade skincare is its simplicity and purity. Natural ingredients are full of vitamins, minerals, and antioxidants. They work together to bring back your skin’s natural glow.
Benefits of Natural Ingredients
- Zero synthetic additives
- Gentle on sensitive skin
- Cost-effective solutions
- Nutrient-rich formulations
Why Choose Homemade Solutions
Creating your own skin brightening treatments lets you control what touches your skin. Store-bought products often have hidden chemicals that can harm your skin.
“Nature provides the most potent ingredients for skin health and radiance.”
Science Behind Skin Brightening
Skin brightening isn’t about bleaching or changing your skin tone. It’s about making your skin look even and bright by fighting hyperpigmentation and boosting cell turnover. Ingredients like vitamin C, plant extracts, and gentle exfoliants help show your skin’s natural glow.
Knowing the science of natural skin brightening helps you make better skincare choices. Your skin deserves care that’s both effective and gentle.
beauty recipe Brightening Mask-potato-cornstarch-milk-lemon
Discover the secret to glowing skin with a simple potato face mask. It’s a natural, affordable way to brighten your skin. This homemade recipe uses common kitchen items to create a powerful skin-brightening solution.
Your lemon brightening mask is backed by science. It uses potato, cornstarch, milk, and lemon to tackle many skin issues at once. This mix is a game-changer for your beauty routine.
- Potato provides natural skin-lightening properties
- Cornstarch helps absorb excess oil
- Milk offers gentle exfoliation
- Lemon brings vitamin C-powered brightening
The magic of this milk and lemon mask lies in its simplicity and powerful natural ingredients. Each part works together to:
- Remove dead skin cells
- Reduce dark spots
- Even out skin tone
- Provide deep hydration
“Nature’s pharmacy is right in your kitchen – no expensive products needed!”
Your skin deserves natural care that’s both gentle and effective. This homemade mask shows that beautiful skin doesn’t need fancy or pricey treatments.
Essential Ingredients and Their Properties
To make the perfect potato starch mask, you need to know what each ingredient does. Each one adds special benefits to your skin care routine. Together, they help your skin glow and look radiant.
Potato’s Skin-Brightening Power
Potatoes are full of natural ingredients that brighten your skin. They have lots of vitamin C and enzymes. These help reduce dark spots and make your skin tone even.
The potato starch mask can lighten hyperpigmentation. It also gently exfoliates your skin.
- Contains natural bleaching agents
- Helps reduce skin discoloration
- Provides gentle skin smoothing
Cornstarch’s Absorption Benefits
Cornstarch is a natural mattifier for your skin. It absorbs extra oil, shrinks pores, and makes your skin smooth. In a potato starch mask, cornstarch controls shine and gives your skin a soft, matte look.
Milk’s Exfoliating Properties
Milk isn’t just a beauty myth for glowing skin. It has lactic acid, which is a gentle exfoliant. It removes dead skin cells, boosts cell turnover, and makes your skin brighter and more radiant.
| Ingredient | Primary Benefit | Skin Type |
|---|---|---|
| Potato | Skin Brightening | All Skin Types |
| Milk | Exfoliation | Normal to Dry Skin |
| Cornstarch | Oil Absorption | Oily Skin |
Lemon’s Vitamin C Content
Fresh lemon juice boosts vitamin C in your skincare. Vitamin C fights free radicals, boosts collagen, and gives you a natural glow. Lemon juice also brightens and evens out your skin tone.
- Natural antioxidant
- Promotes collagen production
- Helps reduce hyperpigmentation
Step-by-Step Preparation Guide

Starting your natural beauty glow-boosting remedy is all about careful preparation. This diy face mask needs precision and attention to detail. This ensures it works best to brighten your skin.
- Ingredient Selection
- Choose a fresh, firm potato
- Use organic cornstarch when possible
- Select full-fat milk for maximum nutrients
- Pick a fresh lemon with vibrant color
- Preparation Workspace
- Clean all utensils thoroughly
- Use a glass or ceramic mixing bowl
- Gather clean measuring tools
Your homemade skincare routine needs clean tools and fresh ingredients. Contamination can reduce the mask’s effectiveness and potentially harm your skin.
“Skincare is an art, and preparation is your canvas” – Natural Beauty Expert
Getting the right measurements is key for your natural beauty treatment. Here’s a quick guide for ingredient proportions:
| Ingredient | Quantity | Purpose |
|---|---|---|
| Potato | 2 tablespoons | Brightening base |
| Cornstarch | 1 teaspoon | Absorption |
| Milk | 1 tablespoon | Exfoliation |
| Lemon Juice | Few drops | Vitamin C boost |
Pro tip for your diy face mask: Always do a patch test before applying it fully. This ensures it won’t cause any bad reactions with your skin.
Application Techniques for Maximum Benefits
Turning your diy glow recipe into a top-notch at-home spa treatment needs precision and care. The right way to apply it can make your skin hydration and gentle exfoliation routine stand out.
Proper Application Methods
To get the best results with your homemade brightening mask, follow these key steps:
- Cleanse your face well before applying
- Use clean fingers or a soft brush for even spread
- Apply the mask in gentle, upward circular motions
- Stay away from the delicate eye area and any open cuts or wounds
Timing and Frequency
Getting the timing right is key for your diy glow recipe. Typically, leave the mask on for 15-20 minutes. For sensitive skin, start with 10 minutes and slowly increase. Use the mask:
- Once a week for normal skin
- Every 10-14 days for sensitive skin
- Twice a week maximum for oily skin types
Post-Mask Care
After removing your mask, follow these tips to keep the benefits:
- Rinse with lukewarm water
- Pat skin dry with a soft towel
- Apply a lightweight, non-comedogenic moisturizer
- Use sunscreen if going outdoors
Pro tip: Always listen to your skin and adjust your routine accordingly.
Safety Precautions and Skin Testing
When you try DIY skin care, safety comes first. Natural ways to lighten your skin need careful steps to avoid bad reactions.
Before you use a homemade skin brightening mask, remember these important safety tips:
- Do a full patch test 24 hours before using it all over
- Watch for signs of allergies or skin sensitivity
- Make sure your ingredients are clean and fresh
- Stay out of the sun after using masks with citrus
Testing a small area is key to avoiding skin problems. Put a little of your mask on a hidden spot like your inner forearm. Wait 24 hours and look for:
- Redness
- Itching
- Swelling
- Burning
If you have sensitive skin or skin issues, talk to a dermatologist first. People allergic to citrus or with photosensitive skin need to be extra careful with lemon-based recipes.
Your skin’s health and safety are paramount in any DIY skincare journey.
Just because it’s natural doesn’t mean it’s safe for everyone. Always pay attention to how your skin reacts. Stop using it if you notice any bad effects.
Storage and Shelf Life
Keeping your natural beauty DIY face mask fresh is key. It needs special care to stay effective and avoid bacteria. This ensures your homemade skincare stays top-notch.
Proper Storage Methods
To keep your organic beauty solution fresh, follow these tips:
- Use clean, airtight glass containers
- Store in the refrigerator right after making it
- Avoid direct sunlight and heat
- Use a tight lid to stop contamination
Signs of Spoilage
Look out for these signs that your mask has spoiled:
- Unusual odor – Fresh ingredients should smell clean
- Visible mold or discoloration
- Separation of ingredients
- Changes in texture or consistency
Batch Size Recommendations
Making the right amount of mask is important. It helps avoid waste and keeps it potent. Here’s a storage guide:
| Batch Size | Storage Duration | Recommended Use |
|---|---|---|
| Small (1-2 applications) | 24-48 hours | Refrigerated |
| Medium (3-4 applications) | Up to 72 hours | Refrigerated, sealed container |
| Large (5+ applications) | Not recommended | Prepare fresh batches |
Your homemade skincare mask is a fresh, natural product. If unsure, it’s best to make a new batch. This way, you get the best results for your skin.
Customization Options for Different Skin Types
Making a diy glow recipe for your skin is like art. You can make your homemade brightening mask fit your skin’s needs. This makes natural skin brightening a personal journey.
Every skin type needs a special approach for radiant skin at home. Here’s how to tweak your potato-cornstarch-milk-lemon mask:
- Oily Skin: Add a tablespoon of clay powder to soak up extra oil
- Dry Skin: Mix in honey or avocado for more moisture
- Combination Skin: Yogurt helps balance your skin’s moisture
- Sensitive Skin: Swap lemon for gentler papaya
Knowing your skin’s needs is key to a great mask. For a cool touch, chill the mix in the fridge before use.
| Skin Type | Additional Ingredient | Benefit |
|---|---|---|
| Acne-Prone | Tea Tree Oil | Antibacterial Properties |
| Aging Skin | Turmeric | Anti-Inflammatory |
| Uneven Tone | Aloe Vera | Skin Brightening |
Try these tweaks to make a mask that’s just right for you. Skincare is all about what works for you, not others.
Common Mistakes to Avoid
Making your own skincare mask is fun and rewarding. But, many people make mistakes that can harm their skin. Knowing these common errors will help you make better homemade skincare.
- Avoid using expired ingredients that may harbor harmful bacteria
- Never leave your skin brightening mask on longer than recommended
- Always patch test new homemade skincare recipes
- Clean all tools and surfaces before preparation
One big mistake in DIY skincare is not respecting natural ingredients. Just because something is natural doesn’t mean it’s safe for your skin. Lemon juice, for example, can be very irritating if not used right.
“Natural ingredients require just as much respect and careful handling as any professional skincare product.” – Dermatology Expert
Keeping things clean is key in homemade skincare. If you don’t, you could end up with a mask that harms your skin. Always use clean tools and work in a clean area.
| Mistake | Potential Consequence | Prevention |
|---|---|---|
| Ignoring Skin Sensitivity | Irritation, Redness | Patch Test Before Full Application |
| Improper Storage | Bacterial Growth | Refrigerate and Use Within Recommended Timeframe |
| Incorrect Application | Uneven Results | Follow Precise Application Instructions |
Remember, your skin is special. What works for others might not work for you. Be patient, careful, and open to learning from mistakes.
Complementary Skincare Practices

Getting radiant skin is more than just one brightening mask. It’s about a whole approach that includes natural lightening and glow-boosting remedies.
Your skin’s health is about both what you put on it and what you eat. Adding comprehensive skincare practices can make your homemade mask work better. It also helps keep your skin hydrated for a long time.
Essential Diet and Hydration Strategies
Eating right is key for a glowing face. Here are some diet tips:
- Drink at least 8 glasses of water daily
- Eat foods high in antioxidants like berries and leafy greens
- Add omega-3s from fish and nuts to your diet
- Try to cut down on processed sugar and too much caffeine
Complementary Skincare Routines
Boost your skin’s glow with these extra steps:
| Routine | Benefit | Frequency |
|---|---|---|
| Gentle Exfoliation | Remove dead skin cells | 1-2 times weekly |
| Vitamin C Serum | Brighten and protect skin | Daily morning |
| Hydrating Night Cream | Restore moisture | Nightly |
Remember, consistency is key in your skincare journey. By mixing your homemade mask with these practices, you’ll get radiant skin at home.
Expected Results and Timeline
Starting your natural skin brightening journey with a homemade mask takes time and effort. It won’t work magic overnight, but regular use can make a big difference.
Most people see their skin start to look better in 4-6 weeks. But, how fast you see results depends on a few things:
- Skin type sensitivity
- How often you use the mask
- Your overall skincare routine
- How healthy your skin is
Right after the first few uses, you might notice your skin feels softer and looks brighter. Being consistent is key to getting the best results from natural treatments.
| Timeframe | Expected Results |
|---|---|
| 2-3 weeks | Initial skin texture improvement |
| 4-6 weeks | Noticeable complexion enhancement |
| 8-10 weeks | Significant skin brightness increase |
“Skincare is a journey, not a destination” – Beauty Experts
Use your brightening facial mask 1-2 times a week. Using it too much can irritate your skin. So, it’s important to use it in moderation to get the best results.
Alternative Natural Brightening Methods

Looking into organic beauty solutions is more than just our potato-cornstarch mask. There are many natural ways to brighten your skin at home. These methods can add variety to your skincare routine, making your skin look brighter and healthier.
Let’s explore some effective DIY glow recipes for your skincare:
- Turmeric Mask: A golden spice with anti-inflammatory properties that evens skin tone
- Yogurt Treatment: Natural lactic acid gently exfoliates and brightens skin
- Honey Application: Antibacterial and moisturizing solution for radiant skin
Each natural brightening method has its own benefits. Turmeric masks can reduce dark spots, while yogurt treatments remove dead skin cells. Honey draws moisture into your skin, giving it a natural glow.
“Nature provides the most effective skincare solutions right in your kitchen.” – Holistic Beauty Expert
Your skin is special, so try out these organic beauty solutions to see what works for you. Always patch test and add new ingredients slowly to make sure they’re good for your skin.
Conclusion
Your journey with this homemade brightening mask is a big step towards natural beauty. You’ve learned about a DIY face mask that uses simple, effective ingredients. These ingredients can change your skincare routine and help you get radiant skin at home.
Being consistent is key to seeing great results with your homemade mask. Regular use, along with other skincare practices, will help you take care of your skin in a holistic way. Remember, every skin type is different, so be patient and adjust the mask recipe as needed.
Choosing natural beauty doesn’t have to be hard or expensive. This easy, affordable DIY face mask shows that good skincare can be fun and accessible. Your skin needs gentle, nourishing care, and this mask gives it just that.
Keep trying out natural skincare, stay hydrated, and listen to your skin. Your healthy, radiant complexion is just a mask away, one at a time.
FAQ
How often can I use this homemade brightening mask?
Use this mask 1-2 times a week. Too much can irritate your skin. Watch how your skin reacts and adjust as needed.
Is this mask suitable for all skin types?
It’s gentle for normal to oily skin. If you have sensitive or dry skin, start with a small test. Adjust the ingredients for your skin type.
Can I store the leftover mask mixture?
Make the mask fresh each time. If you must store it, use an airtight container in the fridge for 24 hours. Check for spoilage before using again.
Will this mask help with dark spots and uneven skin tone?
Yes, it can brighten your skin and reduce dark spots. The ingredients help even out your skin tone and make it radiant.
Is it safe to use lemon juice on my face?
Lemon juice brightens the skin but is strong. Use it sparingly or avoid it if you’re sensitive. Do a patch test and avoid sun exposure after use.
Can I add other ingredients to the mask?
Yes, you can add ingredients like honey for moisture or yogurt for brightness. Just be careful not to overdo it and introduce new ingredients slowly.
How long should I leave the mask on?
Keep it on for 15-20 minutes. If you’re sensitive, start with 10 minutes. Rinse with lukewarm water and moisturize afterward.
What should I do if I experience irritation?
If you feel irritation, remove the mask with cool water. Stop using it and see a dermatologist if it doesn’t go away. Always test a small area first.
Internal Links Added:
External Links Added:
Table of Contents
YOUR OPINION VALUES US
LATEST REVIEWS
Sincerely, this is exactly what I was looking for. I have found the right methodology and steps for success, as it combines well with both my job and my personal project. Thank you very much!
Response from
Thanks kindly for your interest and react
Creative thinking plays a major role in shaping one’s personality and integrating it into society, in addition to building confidence.
All the best!
Response from
Thanks kindly for your interest and react
Totaly different idea
I agree, it’s the right path to a we’ll balanced life.
Well done
Response from
Thanks kindly for your interest and react
THANK YOU
Response from
Thanks kindly for your interest and react